As stated in the corresponding article about adding aftermarket resin parts, Model Aces specializes in building authentic-looking, museum-quality scale model replicas of actual WW II aircraft. In this article, we’ll touch on the high points of working with photo-etched parts, but for an excellent, detailed tutorial with great pictures, we recommend chapter 7 of “Building and Detailing Model Aircraft“ by Pat Hawkey.

Out-of-the-box model kits and upgrade kits are not perfect or might not be the version of aircraft that you want to build. Rely on your own research to decide what aftermarket parts, if any, you want to add to your kit to achieve the level of authenticity that you seek. Debate the pros and cons of adding any part, as more is not necessarily better – the goal is realism. As part of your research, it is helpful to read kit reviews to get a better understanding of various kits’ strengths, weaknesses and what pitfalls to avoid. Also look for historical photos and the particular aircraft’s plans and drawings whenever possible.

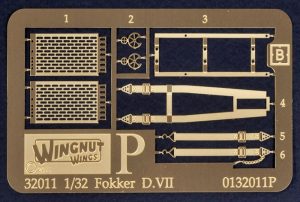
After resin parts, photo-etched parts are the other popular choice for aftermarket detail. Photo-etching, also known as photochemical machining, is a process that can produce fine, highly complex parts from sheet metal. A variety of metals from soft brass to stiff stainless-steel can be photo-etched. Photo-etching involves using a light-sensitive masking material called a photoresist to areas that are to be preserved. After the photoresist is applied, the metal is subjected to a corrosive “etchant” which removes the unprotected areas. This is called “chemical machining”.

The first step to a successful build is planning. After doing my research, I start by reading through the various instructions. If adding aftermarket parts, you will have multiple sets of instructions. The kit should have an instruction set as well as the aftermarket parts kits. Decide which kit parts you want to replace or augment with photo-etched parts. Don’t feel compelled to use all of the photo-etched parts.
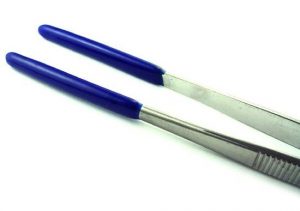
Once you have decided which PE parts you want to use, start removing them from their fret. I usually use specialty hobby scissors or a sharp hobby knife. The hobby knife works best for most PE parts, especially the small ones. Be sure to use a stiff cutting surface such as an old compact disk. If the cutting surface flexes too much it can distort the photo-etched part. Tiny photo-etched parts are notorious for being difficult to hold and for getting lost. I recommend cutting them in an open cardboard box so that if they do fly off the fret while cutting, they will be contained. I also highly recommend purchasing some rubber tipped tweezers to hold and manipulate the parts. Otherwise, they tend to pop out of standard tweezers and get lost.
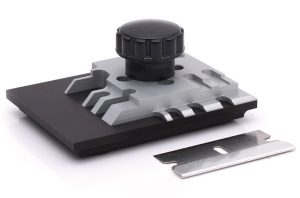
Unlike resin parts which have a three-dimensional quality, photo etched parts start out flat. This is alright for things like tiny gun sites, spoked wheels, seat belts and instrument panels. However, for other applications, the PE parts will need to be bent into shape. Simple bending can be performed with a razor. However, if you have a complex build with multiple PE parts, you should consider purchasing a bending tool. A variety are available such as Hold & Fold, Etch Mate and Mr. Fold-It. I use a Hold & Fold unit. The bending tool holds the PE part exactly in place while you bend it with a razor or a larger blade like a Stanley utility knife blade.
Once the PE part is bent to your liking and fitted into the model, it has to be secured into place. Unfortunately, the polystyrene cement that you use to glue plastic parts together will not work on photo-etched metal parts. The popular choices to secure PE parts into place are superglue (cyanoacrylate), epoxy and sometimes soldering. If there is a large enough bonding area, superglue usually works well for tiny, light parts that aren’t subjected to any load that would cause them to pop free. One downside of superglue that I really don’t like is that it can “fog” clear parts like cockpit canopies so you have to use caution. Epoxy usually provides a strong hold, but it can be stringy and difficult to work with. Also, epoxy can sometimes be seen after the part is cemented in. Solder can be an excellent choice for metal-to-metal bonds.
Leave a Reply